Making a diy birthday banner is an easy and fun project that will be the perfect addition to your birthday festivities. Plus, you’ll have a blast choosing colors, designs, and messages that will make the banner one-of-a-kind—just like the guest of honor!
Just pick between craft paper or fabric, or use the readiness of pre-cut. There’s so much opportunity to customize to fit the overall theme and feel of the party! A DIY banner can add a personal touch to your birthday bash on a budget.
You can even make it a family project — have everyone pitch in on creating something wonderful. In the next few sections, I’ll outline some basic steps and some go-to tools that you’ll find really helpful.
Looking to create a personalized banner that will have people buzzing?
Plan Your DIY Banner Project
Whether you’re making a custom birthday banner, planning your design really does set the stage for a great project. By structuring key concepts such as purpose, style, and available space, you’ll be creating a path to an end result that is functional and aesthetically pleasing.
Let’s dive in!
Define Banner’s Purpose and Style
Begin the process by thinking about who the banner is targeted at and what overall “vibe” you are hoping to achieve. A child’s birthday especially calls for fun designs full of exciting colors.
An adult’s party tends to focus on sophisticated designs with shiny gold or silver details.
Choosing Your Materials
This is the fun part. To make a fabric banner, you’ll want at least 1 yard each of fabric, backing fabric, and batting. If making a paper banner, use 12” x 12” cardstock.
Even a basic craft paper cutter will do wonders to give you those clean, straight edges! Final design of each pennant should be no more than 4 inches wide by 6 inches tall. This size usually works best for visibility but conserves space.
Choose a Theme and Color Scheme
Your theme connects the banner to your party’s general aesthetic. A jungle party could use lots of green and brown earthy colors.
A pastel color palette would work perfectly for a party with a spring theme. Choose a color scheme to suit your message, and stock up on supplies.
For appliqué letters, you’ll need at least 1/3 yard of fabric and fusible web to adhere them properly. Each letter, which is about 2.5 inches by 3.5 inches, fits nicely side by side using a project template that you can download to ensure everything lines up perfectly.
Measure Banner Space Accurately
Lastly, take measurements of your display space. Allot enough space on your cutting mat with a grid to plan out the placement of your pennants.
Make your cuts every 4 inches or at the 4- and 8-inch marks of your sheet for uniformity. Getting the right measurements up front will help you avoid an unprofessional final product.
Essential Supplies for Your Banner
Each material factors into creating a birthday photo banner that’s just as eye-catching as it is capable of withstanding the elements. Here’s a rundown of the essential supplies to make your diy banner and keep your project simple and fun.
1. Gather Basic Crafting Materials
Take some time to really think through your banner before you begin. A self-healing mat with grid lines is super helpful for measuring and cutting straight lines.
Combine it with a straight ruler to get precision when cutting t-shirt fabric or cardstock. Heavy duty scissors are a must to cut heavy fabric and thick ribbon, but a paper trimmer makes straight cuts on cardstock a breeze!
These essentials provide the groundwork for an easy crafting experience.
2. Select Banner Material Options
For a fabric-based banner, collect 1/4 yard of five different fabrics to use. This colorful selection will bring a beautiful surprise medley of bright colors, patterns and textures!
If you are more of a paper person, use 12” x 12” cardstock, giving you six pennants per sheet. Plastic and fabric both materials provide versatility, allowing you to create a unique design to suit your needs.
3. Pick Lettering and Embellishment Tools
Sticker letters, found at any craft store like JoAnn, are a great way to quickly and neatly provide some letters to spell out your message.
For some extra pizzazz, grab the glitter, rubber stamps, or markers to personalize each pennant.
4. Choose Adhesives and Fasteners
Fusible fabric interfacing serves as an excellent stabilizer for fabric pieces, making it ideal for projects like a fabric birthday banner. Additionally, double-sided tape or glue dots are effective options for securing embellishments without creating a gooey mess.
5. Get Stringing and Hanging Supplies
Use string or ribbon, at least 10-15 feet long, to hang your birthday photo banner. All five award ribbon colors will make your design instantly pop!
Design Your Unique Birthday Banner
Designing a birthday banner is more than just making a party supply—it’s about creating an experience that is unique and thoughtful. A creatively designed banner can not only complete the tone you wish to set for the celebration, but make a memorable impression on all of your guests.
With creative touches and a willingness to experiment, you can create a beautiful custom birthday banner that brings the celebration to life.
Select Fonts for Readability
Fonts are one of the most important aspects of your banner’s readability. Use bold, sans serif fonts that are legible from afar. To match a fun theme, you might opt for rounded or handwritten fonts, whereas more formal celebrations might require serif or script fonts.
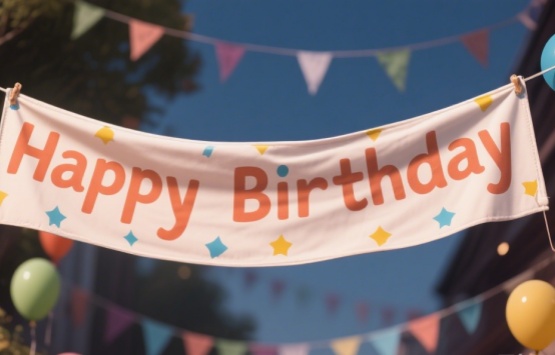
Consider font hierarchies. Font pairing is another way you can add dimension. Try using a heavier impact title font with something less complex as a secondary font. A big “Happy Birthday” done up in a fun, bubbly font just vibrates with joy.
Finish it off with an elegant, minimalist name underneath for a refined effect. Make sure to check how easily the text can be read before you finalize your design.
Incorporate Thematic Embellishments
Whatever your party’s theme, you can make your custom birthday banner complement it. If you’re having a beach-themed birthday party go on and include clip art of shells or the ocean.
Using our online design tool, you can browse thousands of background and clip art designs. Better yet, you can upload your own artwork to make it one-of-a-kind! For those looking to take the custom route, our personalized graphic design services can develop a unique birthday design based on your party’s theme.
Personalize with Names and Photos
Personalizing with names, pictures, or other designs makes your birthday banner a one-of-a-kind memento. Add an adorable photo of the birthday kiddo or a montage depicting achievements over the last 12 months.
Pair this with a sweet birthday wish, and you’ll be celebrating their journey and your great nonprofit’s mission. Our long-lasting 13 oz woven fiber material keeps your banner looking good inside or outside for any special event.
Step-by-Step Banner Creation Guide
Creating a homemade birthday banner makes your celebration even more special. In addition, it saves you time and money! By modifying each aspect, you take the opportunity to make something truly one-of-a-kind that perfectly matches the event.
Here’s how to create a billboard-sized banner, step-by-step.
Prepare Your Materials and Workspace
Step 2. Get your materials together! You’ll need some cardstock, string, scissors/paper trimmer, adhesive (glue/tape), and optional decorations like sticker/marker.
Pick cardstock colors that coordinate with your party décor or theme. A clean, flat workspace is essential to keep everything organized.
Step Two—Cut Your Cardstock to Size. Use a ruler to make three little perpendicular marks on your cardstock at the 2-inch, 6-inch, and 10-inch lines. This will help ensure that all of your cuts will have even spacing.
A paper trimmer is useful for this step. Cut at the 4-inch and 8-inch increments to make the pieces of the banner.
Design considerations: Each piece needs to be roughly 4 feet wide. Account for ample space since big block letters could be as large as 2.5 feet x 3.5 feet.
Cut and Arrange Banner Elements
After all of your banner pieces are cut, lay them out in the order of your message to see how they will stack up. For instance, if you’re planning to spell out “Happy Birthday,” arrange each word horizontally in a row.
This allows you to get a feel for the overall design before it’s completed. Cut letters out of bold, readable cardstock in a contrasting color or buy pre-cut letter stickers.
You can even choose to hand-letter your pieces for a more handwritten feel.
Attach Letters and Decorations Securely
Attach each letter to its corresponding banner piece with a glue stick or double-sided tape. As an optional step, for more pizzazz, embellish around the letters using stickers, glitter, or doodles.
Just punch holes at the top corners of each piece and string them together for an elegant finish. A customized banner like this one is only limited by your imagination and beautiful to look at, making it a great touch to any graduation celebration.
Creative Banner Embellishment Ideas
More than just a unique way to decorate a space, a custom birthday banner helps create a personal, memorable setting for a birthday celebration. With the right personal embellishments, you can take a basic project and turn it into something extraordinary.
These concepts combine creative magic with functionality to make sure your banner isn’t lost in the…shadows.
Add Glitter and Sparkle
Adding glitter is one of the simplest ways to ensure your banner is eye-catching. Cut adhesive glitter tape and outline the edges of each piece of the banner. Or, use clear liquid glue to coat the letters, then sprinkle loose glitter over them for a beautiful glittery effect.
If you want something a little stiffer, consider using glitter cardstock as a base for your banner. This is perfect for milestone birthdays, when a little extra glam can celebrate how special turning ____ is.
Stick-on gems or metallic stickers are a great way to add a touch of shimmer and shine without adding a complex layer.
Use Ribbons and Tassels
Ribbons and tassels are easy, unexpected embellishments that add texture and a sense of motion. Attach thin satin or grosgrain ribbons in coordinating colors to the bottom of each banner piece or along the string holding the banner together.
Tie on small tassels of tissue paper or yarn, every so often along the twine. This will give you such a fun decorative vibe! Use a pastel palette for children’s parties or a metallic color scheme for events geared toward grownups.
Incorporate Nature-Inspired Elements
Artist-designed, nature-inspired touches keep the space warm and whimsical. Small faux flowers, leaves, or even bunches of dried lavender can easily be glued to the banner pieces.
For summer, patio and garden parties, try incorporating wood beads or natural jute twine to bring an earthy touch to your decor.
Hanging Your Birthday Banner
No matter what kind of celebration you’re hosting—inside or outside, formal or casual—a birthday banner can help your party vibe right. This is probably the most important tip, since how you hang it truly makes all the difference in how polished and secure it appears.
Choosing the most effective method and tools will make certain that your birthday banner doesn’t blow away but rather adds to the magic of the celebration.
Choose the Best Hanging Method
The first step is determining how you will hang your birthday banner according to its size and where it will be. For lighter-weight birthday banners, you can just use string or ribbon threaded through pre-cut holes for a simple, classic appearance.
For extra heavy or outdoors banners, you may want to use Banner Ups adhesive tabs. These tabs adhere securely to the corners and offer integrated eyelet holes for stringing up rope or bungee cords.
Insert Clear PowerTape under the top and above the bottom edges. This additional reinforcement will ensure that your birthday banner is built and designed to last, time and elements alike.
For example, a banner attached in this manner will hold up on an outside fence or building for several months without the worry of tearing.
Secure Banner for Indoor Display
For indoor spaces, removable wall hangers such as command hooks, removable adhesive strips, or removable thumbtacks provide versatility while protecting walls.
Remove the backing from each of your banner adhesive tabs, and gently press your letters and characters onto your banner’s background. Once all are attached, weld them together firmly.
Above a dessert table or home fireplace for instance, make an eye-catching feature, putting the spotlight on your party decorations.
Hang Banner Safely Outdoors
If you plan to hang your banner outside, taking steps to weatherproof it is important. For a more permanent approach, attach Banner Ups adhesive tabs in each corner, then attach each tab with rope or zip ties to poles or fences.
Prevent edges from tearing in windy or rainy conditions by reinforcing edges with Clear PowerTape.
Avoid Common Banner Mistakes
Creating a birthday photo banner can be a rewarding project that you can take pride in. It’s surprisingly easy for small mistakes to derail the end product. By focusing on finer details, such as proper alignment and double-spacing, you ensure your DIY banner looks crisp and tight, enhancing the beauty of your special day.
Prevent Lettering Alignment Issues
Mistake #4 – Uneven Lettering This is a very common banner making mistake. Misaligned text can instantly make your banner look sloppy or haphazard. Never freehand, always use a guide, like a ruler or pre-drawn lines.
This will make sure your letters don’t get crooked and vary in height. For example, let’s say your banner reads “Happy Birthday”—If you have two sections, make sure each letter matches up on the top and bottom, vertically and horizontally.
Adhesive letters or stencils ensure continued accuracy and adherence to style. Using a consistent graphic style throughout the banner will help lend an overall polished, cohesive feel.
Ensure Proper Spacing
Spacing is one of the things that can really kill your banner’s readability. Too many crowded letters or design elements can become visually confusing, whereas too much white (or negative) space may seem like a design is incomplete.
If you’re using all caps, keep a minimum of 1 inch between letters for legibility. On top of that, leave 2 inches on the outside edges to create visual balance. Eliminate overcrowding.
Keep added visual decorations to a minimum, using no more than 2-3 custom graphics or images. Simplicity, when combined with smart spacing, adds to the elegance of the banner and draws more attention to the message.
Securely Fasten All Elements
Fraying seams or strings or loose pieces can drastically affect the beauty and functionality of the banner. Fix the elements of your banner with a heavy duty adhesive, such as double sided tape, glue dots or string, to make sure nothing moves.
Ensure the banner can withstand a little shaking or use a test-run banner a day or two in advance of the event. This one-off action cuts out all those final foyer fiascos.
Eco-Friendly Banner Options
Creating an eco-friendly birthday photo banner is not only a thoughtful choice but a practical way to celebrate while reducing waste. As areas such as the EU move toward a ban on plastic-based banners due to their negative impact on all environments, greener alternatives like a fabric birthday banner are needed now, more than ever, reflecting our commitment to sustainable birthday planning.
Use Recycled Materials
Recycled materials provide an easy but creative approach to making an eco-friendly birthday banner. Card stock, which is usually produced from recycled paper, makes an excellent art project foundation. Old magazines, newspapers, or even scrap fabric can add texture and color, turning what might have been waste into something festive.
For outdoors or where you want them to hang, use jute twine or hemp rope. Both alternatives are strong and eco-friendly. By shifting your focus to recycled materials, you’ll be able to save on costs. It’s an important thing to do because almost 80% of all plastic banners eventually end up polluting our oceans or landfills.
Opt for Biodegradable Options
When choosing materials, biodegradable products are an easy eco-friendly option. For example, kraft paper or plant-based plastic banners will naturally decompose over time without leaving any toxic byproducts. A few companies have even developed pre-cut biodegradable basic banner kits, including the biodegradable string, thread or twine, you’ll need.
These options are ideal for one-off events, or those looking to sustainably tread lightly on the planet.
Repurpose Existing Decorations
Repurposing festive decorations you already own is yet another fun, earth-friendly option! Leftover ribbon, fabric scraps, or even old party décor can be transformed into banner pieces. This reduces waste and resource use, and it makes your banner feel more unique and handmade.
Eco-friendly, reusable banners can be easily stored and passed on to be used for years to come, providing a more long-term, sustainable option.
Modernize Traditional Banner Techniques
Putting a modern twist on classic banner techniques can ensure that your DIY birthday banner stands out. By combining traditional methods with cutting machines and contemporary quilt patterns, you can create a more sophisticated and customized design that sets your work apart.
Incorporate Digital Design Elements
Digital tools, especially those introduced with Cricut machines, are true game changers in the crafter’s world. With Cricut Design Space, you can create detailed designs and patterns with a level of precision that hand-cutting may overlook.
For example, you can choose from a font, shape, or themed icon to create a cohesive look in seconds. If you want to take a DIY approach to things, start by drawing a design on thick paper. Then, if necessary, use scissors or a paper cutter to trim it down and get crisp edges.
You’ll produce a more professional-looking base for fabric banners in considerably less time with a cut-and-sew, customizable panel. Discover this colorful, modern alternative at independent retailers including Quilters Candy.
Use Stencils for Precise Lettering
Stencils are an easy solution when you need to paint consistent lettering on your banner. Set down your yard stick, and measure an inch above cross-sections, and line up your stencil for a uniform look.
This technique is really nice on paper, fabric or even cardstock. Fusible web for appliqué adds a contemporary flourish to fabric banners. Now, you can easily iron on letters or designs with no trouble at all!
It’s a similar but quicker process, and a great and easy way to add detail, precision, and longevity to your project.
Add 3D Elements for Visual Impact
Add depth and personality to your banner with 3D elements such as felt flowers, foam letters, or layered paper cutouts. Affix these with glue dots or craft glue for a strong hold.
For backing, a plain piece of fabric about a yard wide will provide the needed structure, but still allows for a light, airy design. In only 1 ½ hours, you’ll walk away with a colorful, textured banner that uniquely represents you and your creativity.
Conclusion
Whether it’s for a young child or an adult, making DIY birthday banners will give everyone the special treatment they deserve. It’s not only an art project. It’s how you can turn an otherwise ordinary day into one that’s beautiful, celebratory, and overflowing with love. Every step, from picking the design to adding those little extra details, shows care and effort that store-bought banners just can’t match.
The good news is, you don’t have to have expensive/trendy tools, or a huge budget. Basic materials and some imagination can take you far. It’s a really creative way to loop everyone in, from family and friends to children.
Gather your supplies and get ready to create. Your custom birthday banner will not only pop, but it will serve as a truly memorable keepsake after the party is over.
Frequently Asked Questions
How do I plan a DIY birthday banner project?
Choose a Appearance
Begin with determining what theme, color palette, and size banner you would like. Draw out your concept and jot down the materials you’ll need. This keeps you on track and makes for a more polished appearance.
What are the essential supplies for making a birthday banner?
You’ll need some sheets of cardstock or relatively stiff paper, scissors, string or ribbon to hang your fabric birthday banner, glue and/or markers. Optional items include stencil letters, stickers, and decorations such as glitter or pom-poms to enhance your birthday planning.
How can I make my birthday banner unique?
Make it your own! Personalize it with the birthday person’s name, their favorite colors, or other custom shapes. You can create a unique birthday photo banner by hand-drawing details or including a photo.
What’s the best way to hang a DIY birthday banner?
We suggest using clear tape, thumbtacks, or these removable adhesive hooks for your birthday photo banner. If you go the outdoor route, just ensure they can be tied with string or zip ties to avoid blowing in the wind.
How do I avoid common mistakes when making a banner?
As with everything, it’s best to measure and plan first before cutting your birthday photo banner. Make sure your spelling and spacing are correct. Consider using high-quality materials so that they don’t tear or fade. Don’t rush it; you’ll be much happier with a more polished result.
Are there eco-friendly options for DIY birthday banners?
Yes! Then create letters for a DIY banner using recycled materials such as old cardboard, newspaper, or fabric scraps. Choose biodegradable string or twine to minimize waste.
How can I modernize a traditional birthday banner?
Add in metallic touches, geometric patterns, or modern aesthetics to your birthday photo banner. Choose trendy fonts, or create the letters in an updated program that can print them out in high resolution, enhancing your birthday planning with a stylish diy banner.
Author: Axhibits | China Banner Printing
Original article source: https://print.axhibits.com/diy-birthday-banner/